steering wheel hand positions, explaining why certain methods are discouraged and what the gold standard is for safe driving.
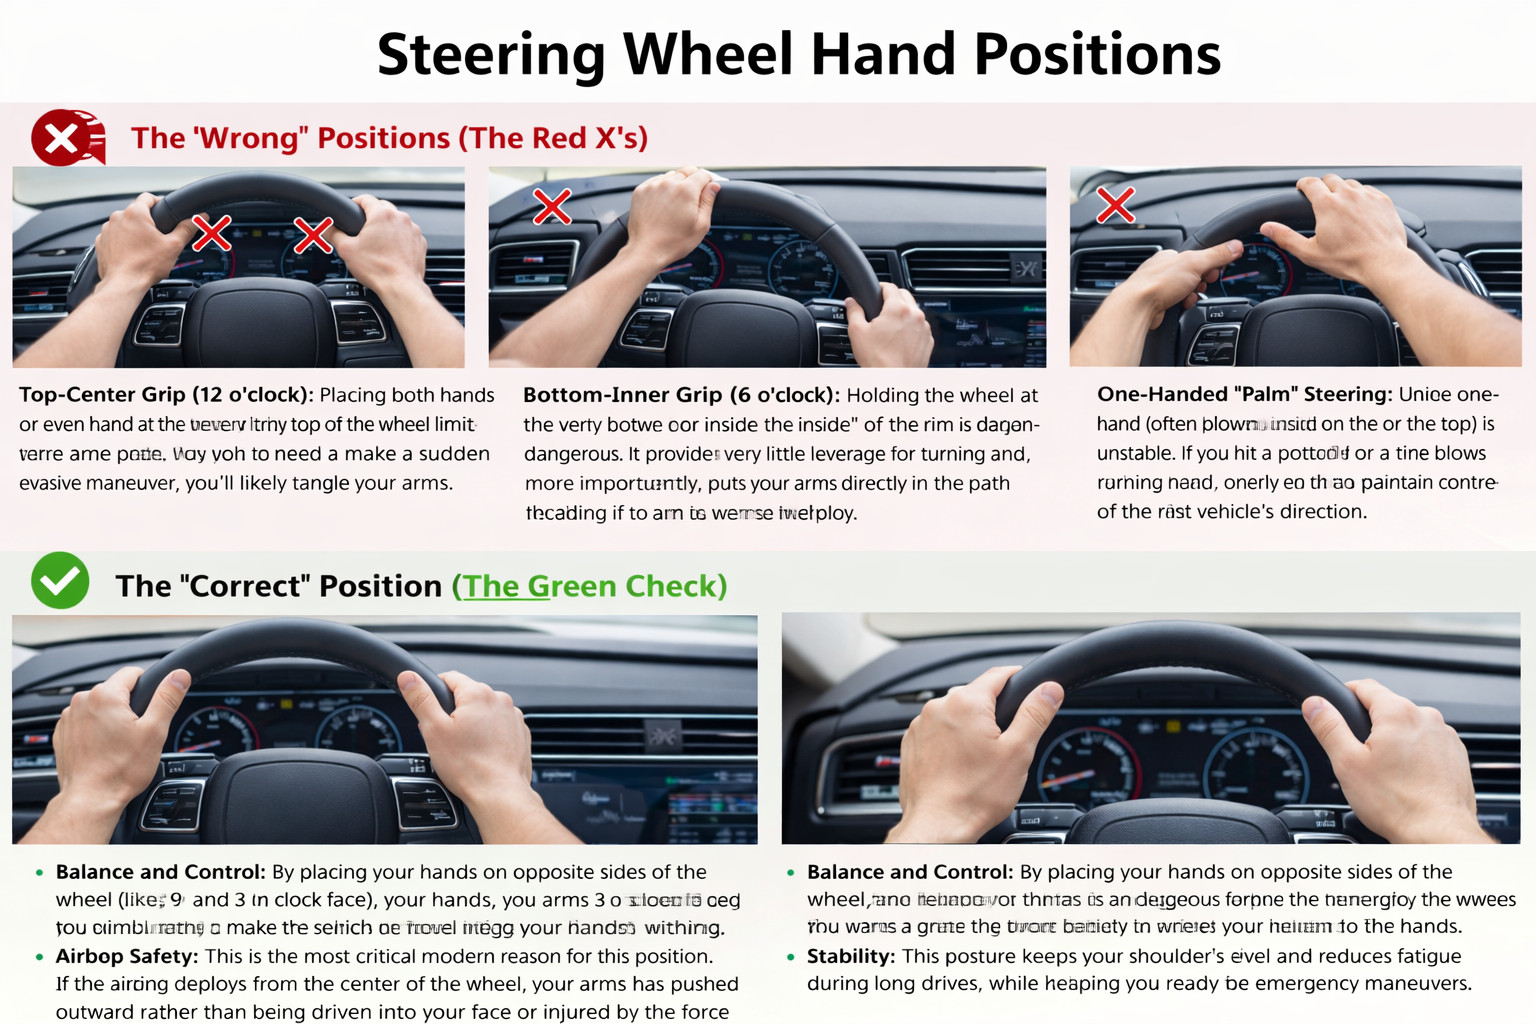
The "Wrong" Positions (The Red X's)
Top-Center Grip (12 o’clock): Placing both hands or even one hand at the very top of the wheel limits your range of motion. If you need to make a sudden evasive maneuver, you’ll likely tangle your arms.
Bottom-Inner Grip (6 o’clock): Holding the wheel at the very bottom or from the "inside" of the rim is dangerous. It provides very little leverage for turning and, more importantly, puts your arms directly in the path of the airbag if it were to deploy.
One-Handed "Palm" Steering: Using one hand (often placed on the horn or the top) is unstable. If you hit a pothole or a tire blows out, one hand is rarely enough to maintain control of the vehicle’s direction.
Cross-Arm/Over-Top Grip: Reaching across the wheel or gripping it with an awkward overhand hook limits your ability to make smooth, continuous turns and can lead to oversteering.
The "Correct" Position (The Green Check)
The bottom image illustrates what is commonly known as the 9 and 3 position.
Balance and Control: By placing your hands on opposite sides of the wheel (like 9 and 3 on a clock face), you have maximum leverage to turn the wheel quickly in either direction without moving your hands.
Airbag Safety: This is the most critical modern reason for this position. If the airbag deploys from the center of the wheel, your arms are pushed outward rather than being driven into your face or injured by the force of the bag.
Stability: This posture keeps your shoulders level and reduces fatigue during long drives, while keeping you ready for emergency maneuvers.
Pro-Tip: The "Thumb" Rule
In the "Correct" image, notice the driver's thumbs are resting along the rim rather than hooked tightly around it. In a collision, the steering wheel can "kick" or spin violently; keeping your thumbs on the surface helps prevent them from being sprained or broken.
Make photo